How to change your Superlock 2.0 Gate Lock from Left-Handed to Right-Handed
When buying gate hardware, one of the more obnoxious things about it is finding gate locks and handles that are facing the right way. Not every manufacturer makes left-handed or right-handed gates hardware in the style you want, leaving you with no other option than to settle on something you might not be completely happy with. Luckily, the Superlock 2.0 series gate locks from GateMaster are all able to be changed from left-handed to right-handed, eliminating the issue altogether. We've put together the instructions on how to change the handing on each Superlock 2.0 model here for you, so just find your model and get to work!
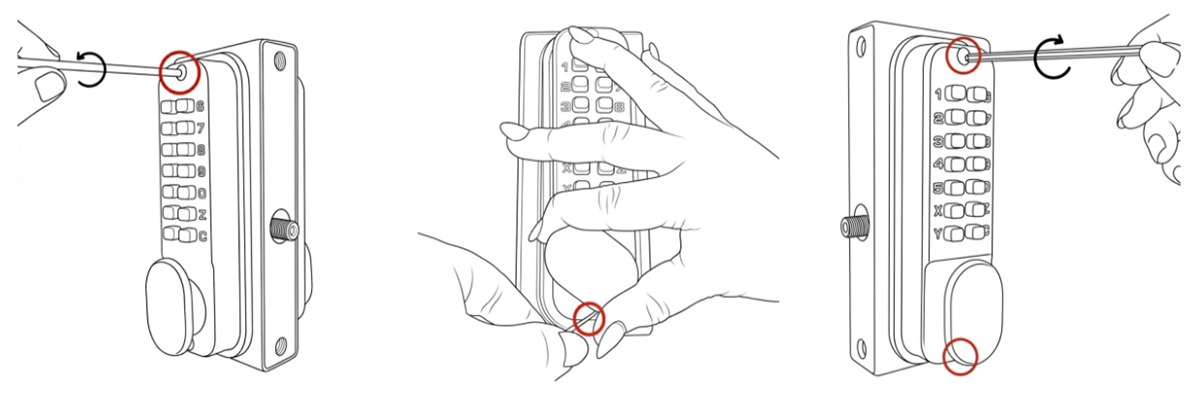
BDGS & BDGSW Superlock 2.0 Code Single-Sided Surface Mounted Locks
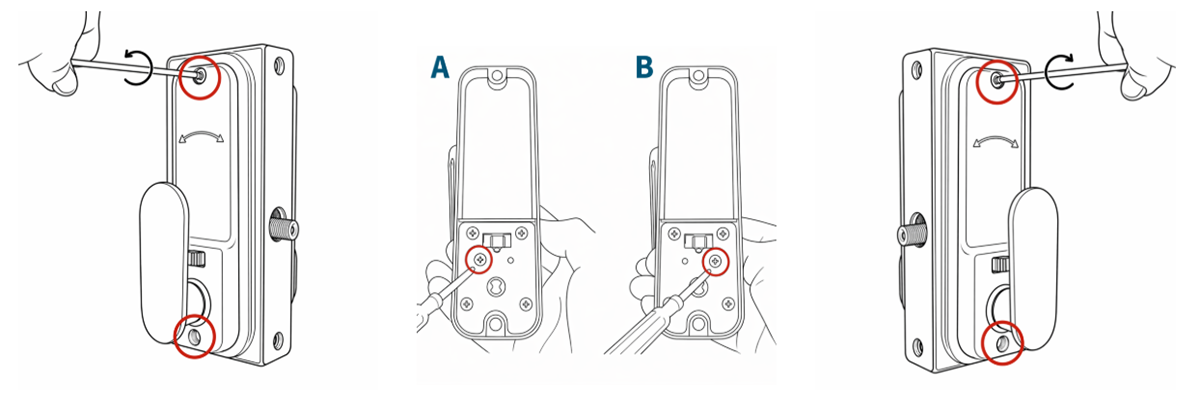
- Using the 3mm hex key, unscrew the two screws located at the top and bottom of the lock. Remove the keypad.
- On the inside handle, unscrew only the blue screw and screw it into the adjacent hole. For left-handing, the screw should be in the right hole (image B) and for right-handing the screw should be in the left hole (image A).
- Refit the keypad on the correct side using the 3mm hex key, ensuring that the flat spindle and rubber gaskets are in place.
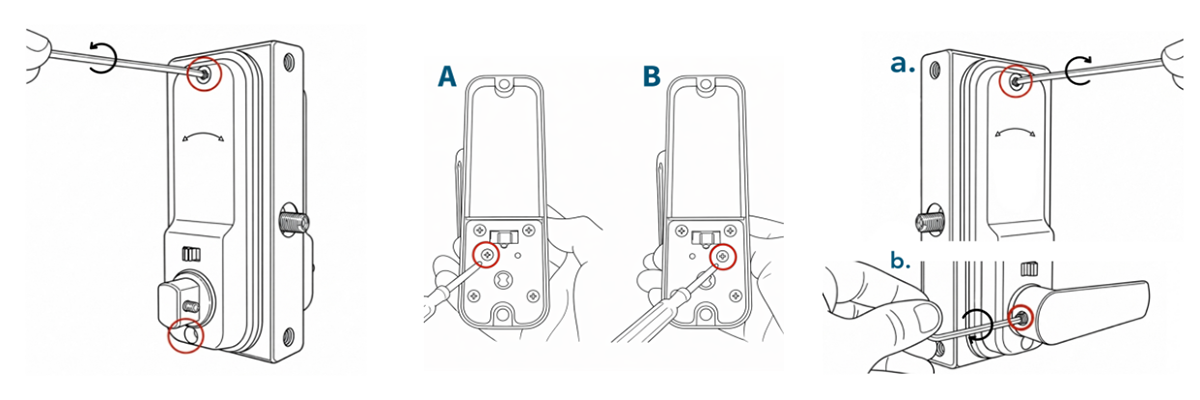
BDG & BDGW Superlock 2.0 Code Double-Sided Surface Mounted Locks
- Using the 3mm hex key, unscrew the top screw of the inside keypad.
- Enter the code and turn the handle and then use a 2.5mm hex key to unscrew the bottom screw. Remove the keypad and rear fixing plate.
- Refit the keypad and fixing plate on the correct sides using the hex keys, ensuring the flat spindle and rubber gaskets are in place. Use the 3mm hex key for the top screw & the 2.5mm hex key for the bottom.
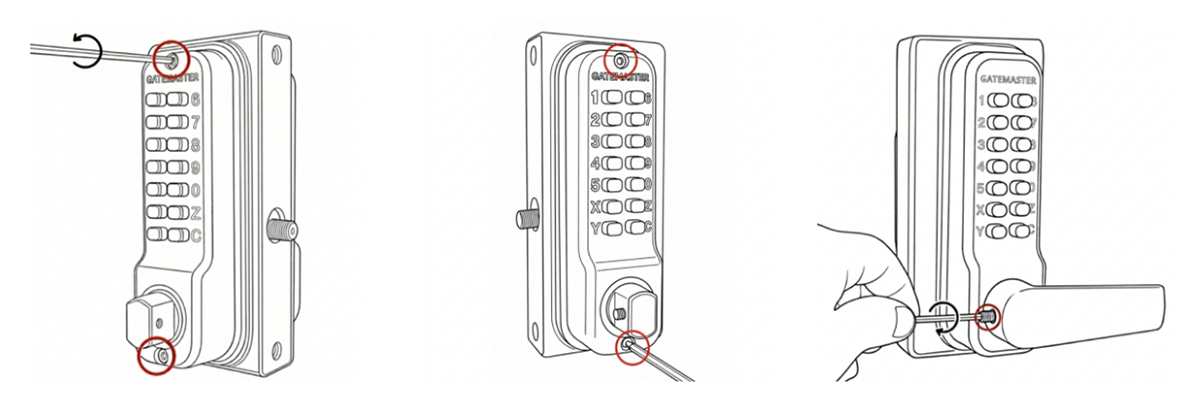
BDGSD, BDGSRR, & BDGSWRR Superlock 2.0 Code Delta Handle Single-Sided Surface Mounted Locks
- Using the 3mm hex key, unscrew the two screws located at the top and bottom.
- Remove the keypad. On the inside handle, unscrew only the blue screws and screw it into the adjacent hole. For left-handing, the screw should be in the right hole (image B) and for right-handing the screw should be in the left hole (image A).
- Refit the keypad using the 3mm hex key, ensuring the spindle and gaskets are in place.
- Using the 2.5mm hex key, screw on the handles to face the opposite way to the latch.
BDGD, BDGRR, & BDGWRR Superlock 2.0 Code Delta Handle Double-Sided Surface Mounted Locks
- Using the 3mm hex key, unscrew the two screws located at the top and bottom.
- Remove and swap the keypads. Refit using the 3mm hex key, ensuring the flat spindle and rubber gaskets are in place.
- Using the 2.5mm hex key, screw on the handles to face the opposite way to the latch.
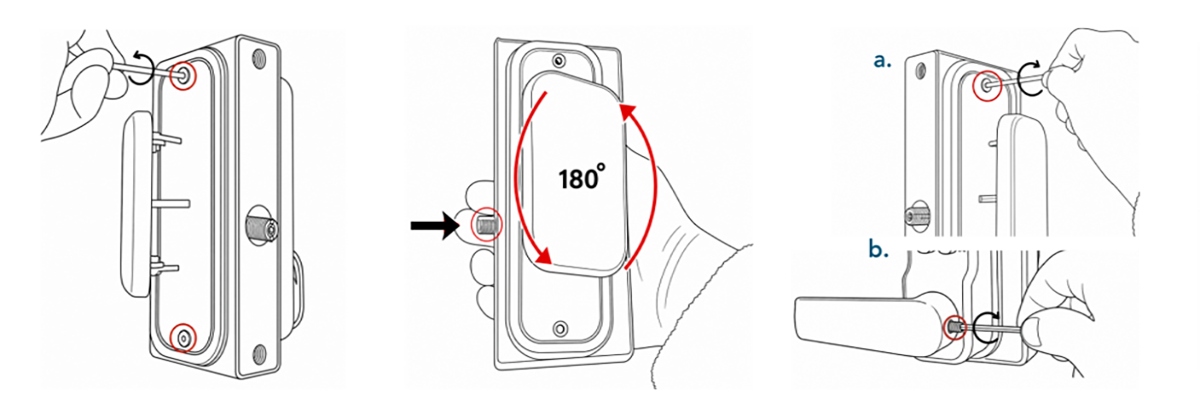
BQDG & BQ-NA Superlock 2.0 Code Quick-Exit Surface Mounted Locks
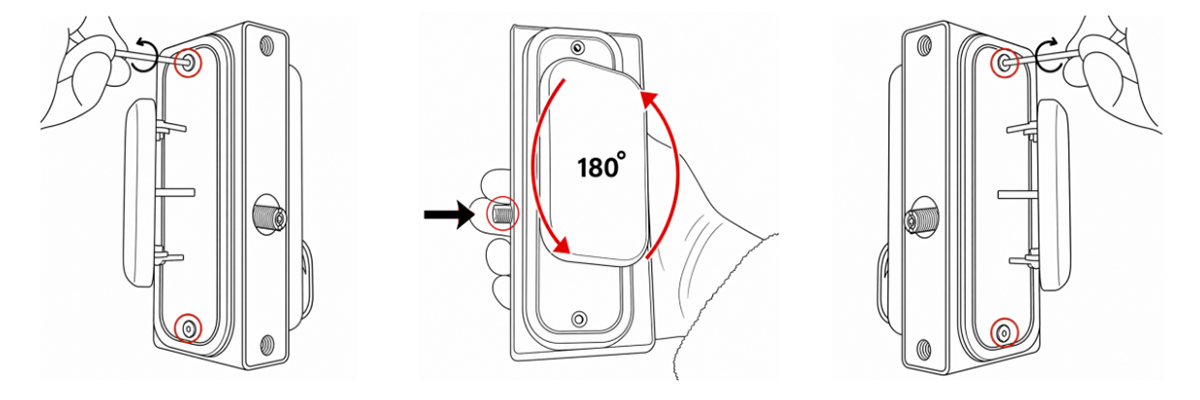
- Using the 2.5mm hex key, unscrew the two screws located at the top and bottom.
- Flip the push pad 180° vertically and mount on the opposite side. Make sure to push the latch thread in before refitting the push pad.
- Refit the keypad using the 2.5mm hex key, ensuring the flat spindle and rubber gaskets are in place. Check the keypad is positioned on the correct side for the required handing.
BQDGRR – Superlock 2.0 Code RapidReset Quick-Exit Surface Mounted Locks
- Using the 2.5mm hex key, unscrew the two screws located at the top and bottom.
- Flip the push pad 180° vertically and mount on the opposite side. Make sure to push the latch thread in before refitting the push pad.
- Refit the keypad using the 2.5mm hex key, ensuring the flat spindle and rubber gaskets are in place.
- Then fit the keypad handles with the hex key, ensuring it faces the opposite direction to the latch.
BQK – Superlock 2.0 Keyed Quick-Exit Surface Mounted Locks
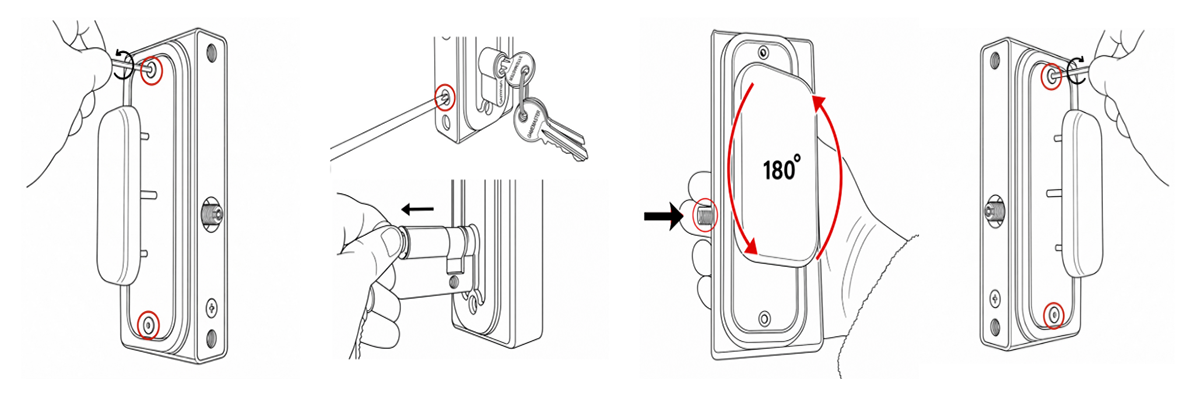
- Using the 2.5mm hex key, unscrew the two screws located at the top and bottom. Remove the push pad and front plate.
- Using a screwdriver, unscrew the screw located on the forend plate. Remove the eurocylinder from the casing by inserting the keys and turning them to either 11 or 1 o’clock. Pull the eurocylinder out and refit on the other side.
- Rotate the push pad 180° and fit it on the opposite side. Make sure to push the latch thread in before refitting the push pad.
- Screw the screws back in and refit the push pad using the 2.5mm hex key, ensuring the flat spindle and rubber gaskets are in place. Check that the push pad is on the correct side for the required handing.